

Getting started
Quick start
Choose an image, cover private details, and export a copy. Follow these four steps in SnapMosaic for Android.
Watch the steps
Choose a timestamp to jump to a step. Use fullscreen for a closer look.
Choose a photo
Open SnapMosaic and choose a photo from the system photo picker. For a first try, use “Try a sample photo” on the start screen.
Smart detection
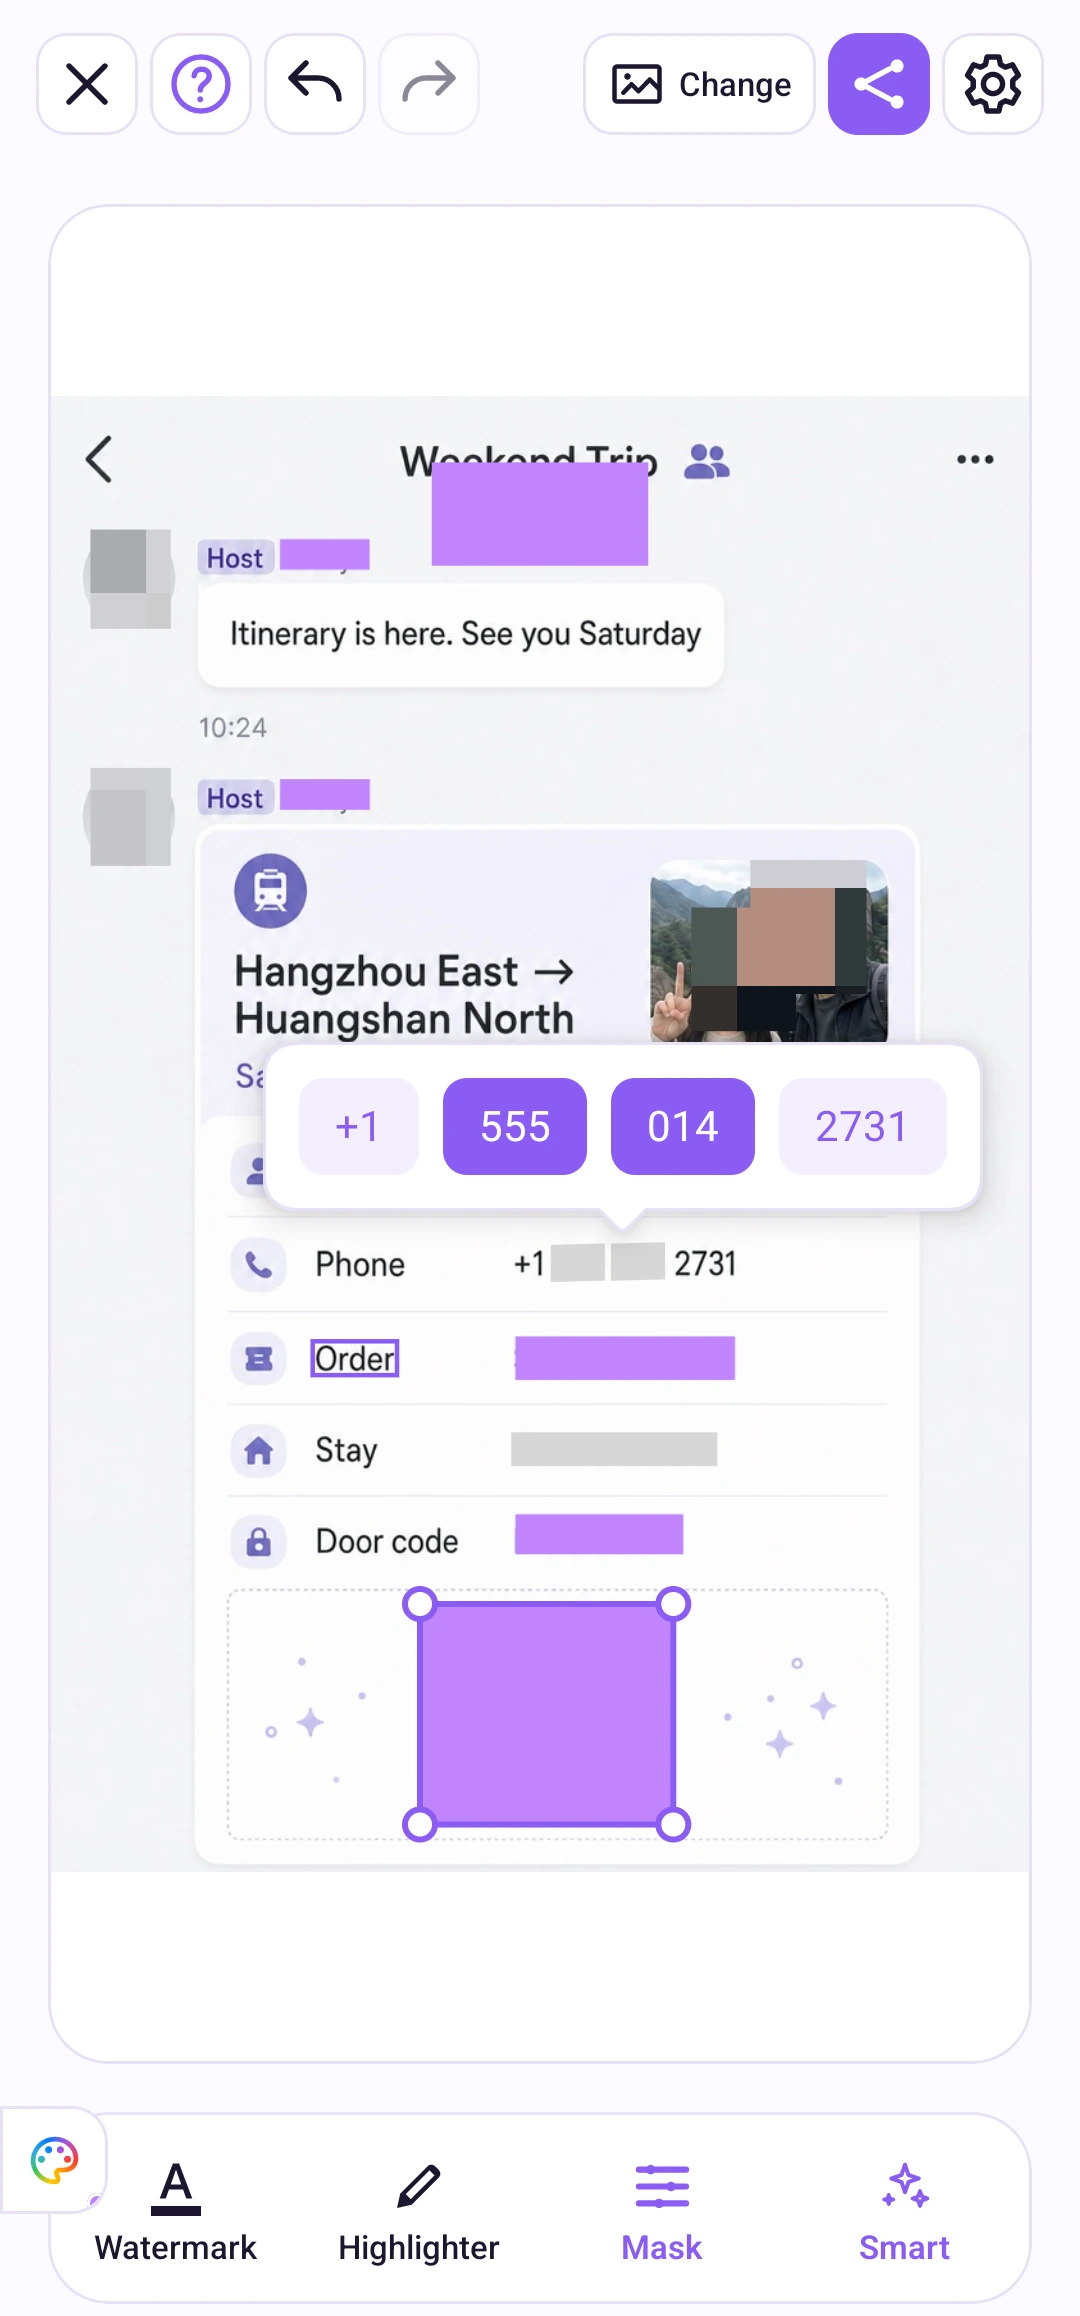
Wait for the photo to load. If automatic masking is enabled, review the applied masks. Otherwise, tap “Smart” at the bottom to apply suggested masks to faces, codes, and common sensitive text.
Manual masking and word selection
Long-press a detected line of text, then choose the individual words or segments to hide. For anything missed, open the masking tool, choose an effect, and use a rectangle or brush from “Adjust”. Use Undo if you make a mistake.
Save and share
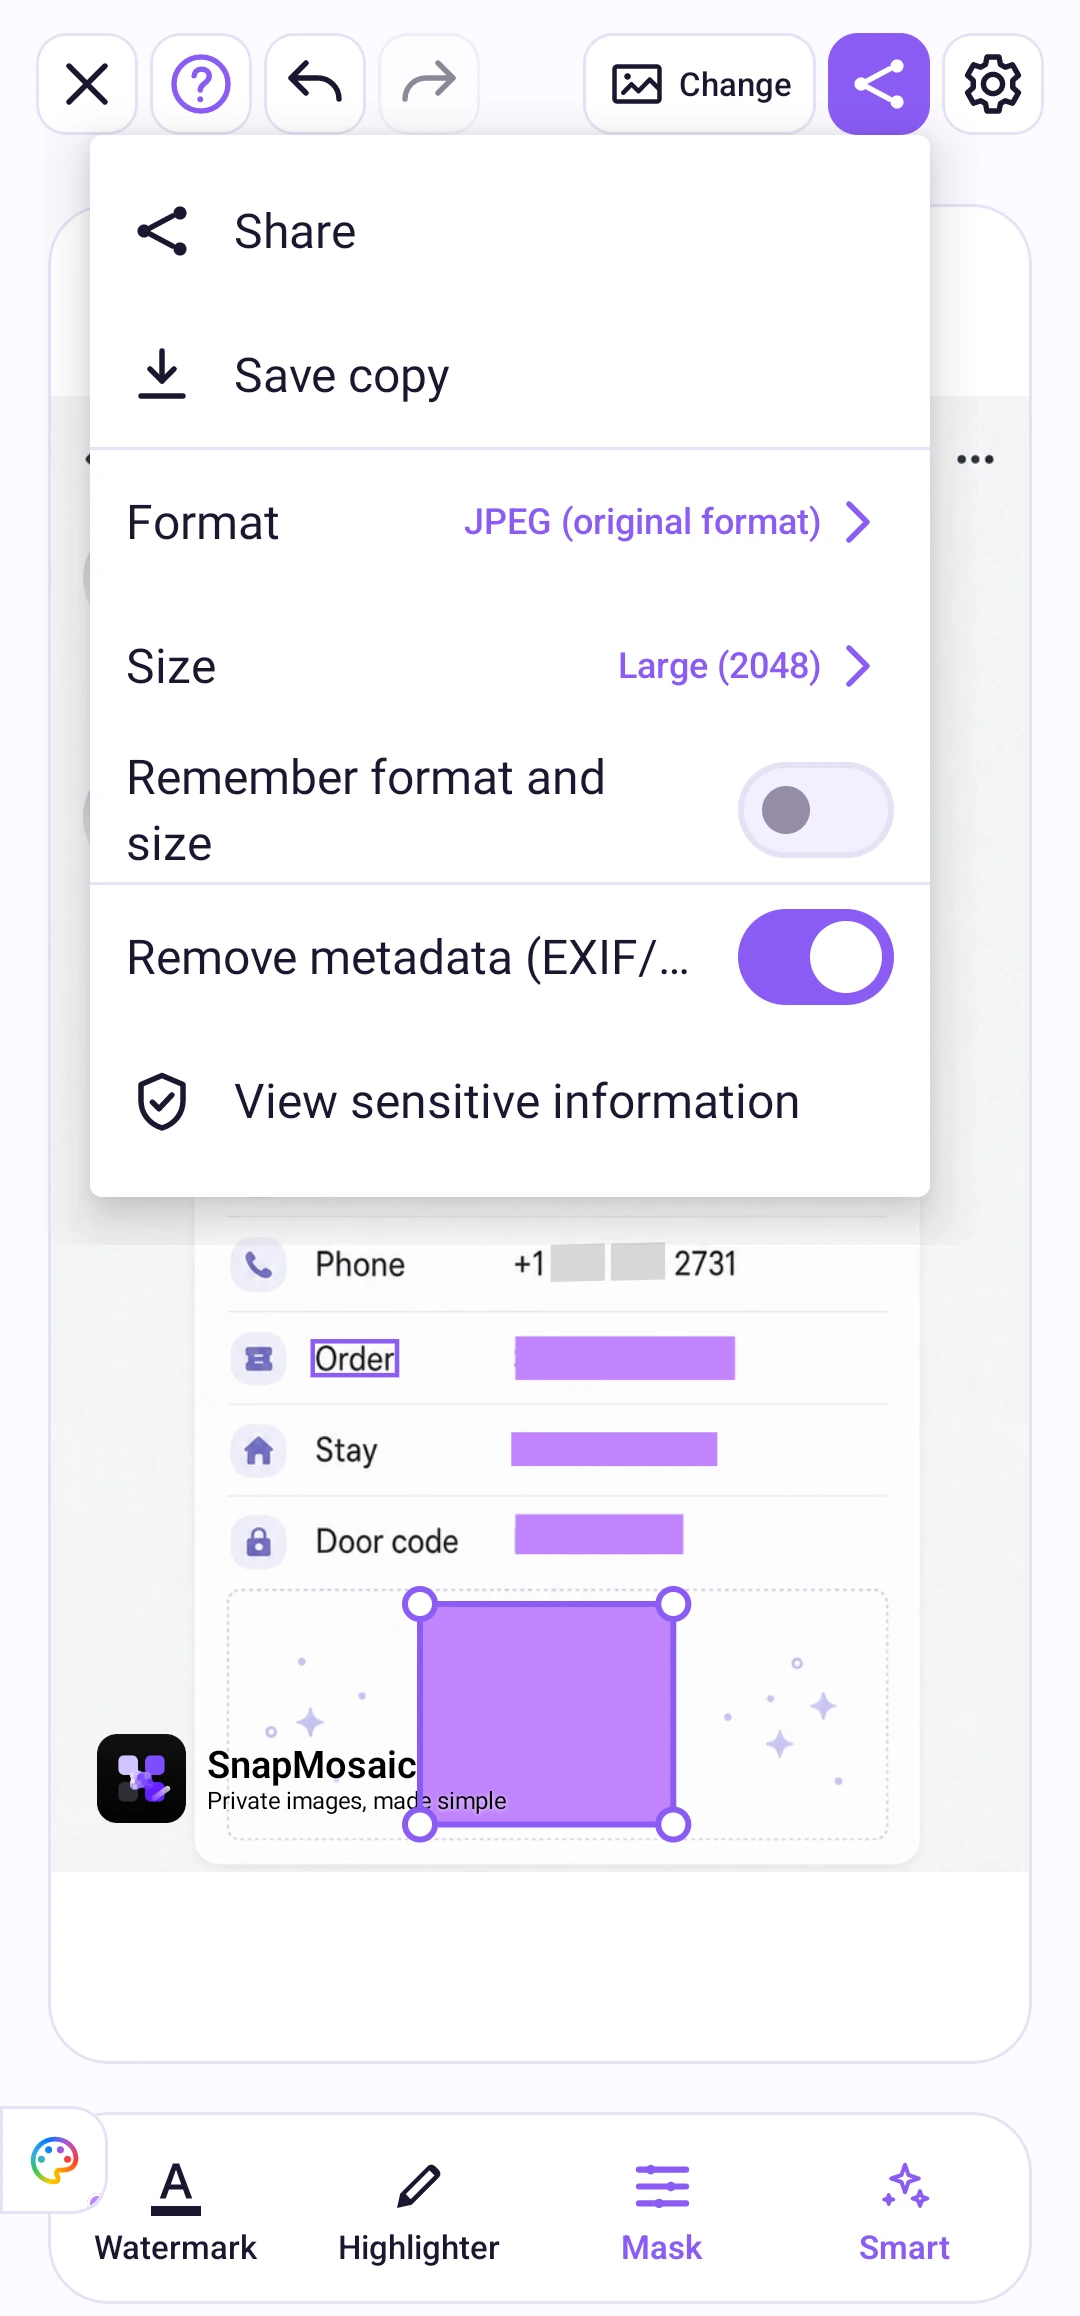
Tap the share icon in the top toolbar. Choose JPEG, PNG, or WebP and an output size. Enable “Remove metadata (EXIF/GPS)” if you want to remove those details from the exported file.
One last look before you share
- Check faces, names, phone numbers, addresses, and codes at a readable zoom level.
- Make sure each detail you want to hide is fully covered. An outline alone does not hide anything in the export.
- Open the saved image and check the result before sending it.