
Photo editing
Manual masking and word selection
Watch the steps
Choose a timestamp to jump to a step. Use fullscreen for a closer look.
Word selection example
Choose exactly what to hide
Tap a segment to cover or reveal it. Try leaving the first and last digits visible.
Covered segments
How to use it
Long-press a detected line of text, then choose the individual words or segments to hide. For anything missed, open the masking tool, choose an effect, and use a rectangle or brush from “Adjust”. Use Undo if you make a mistake.
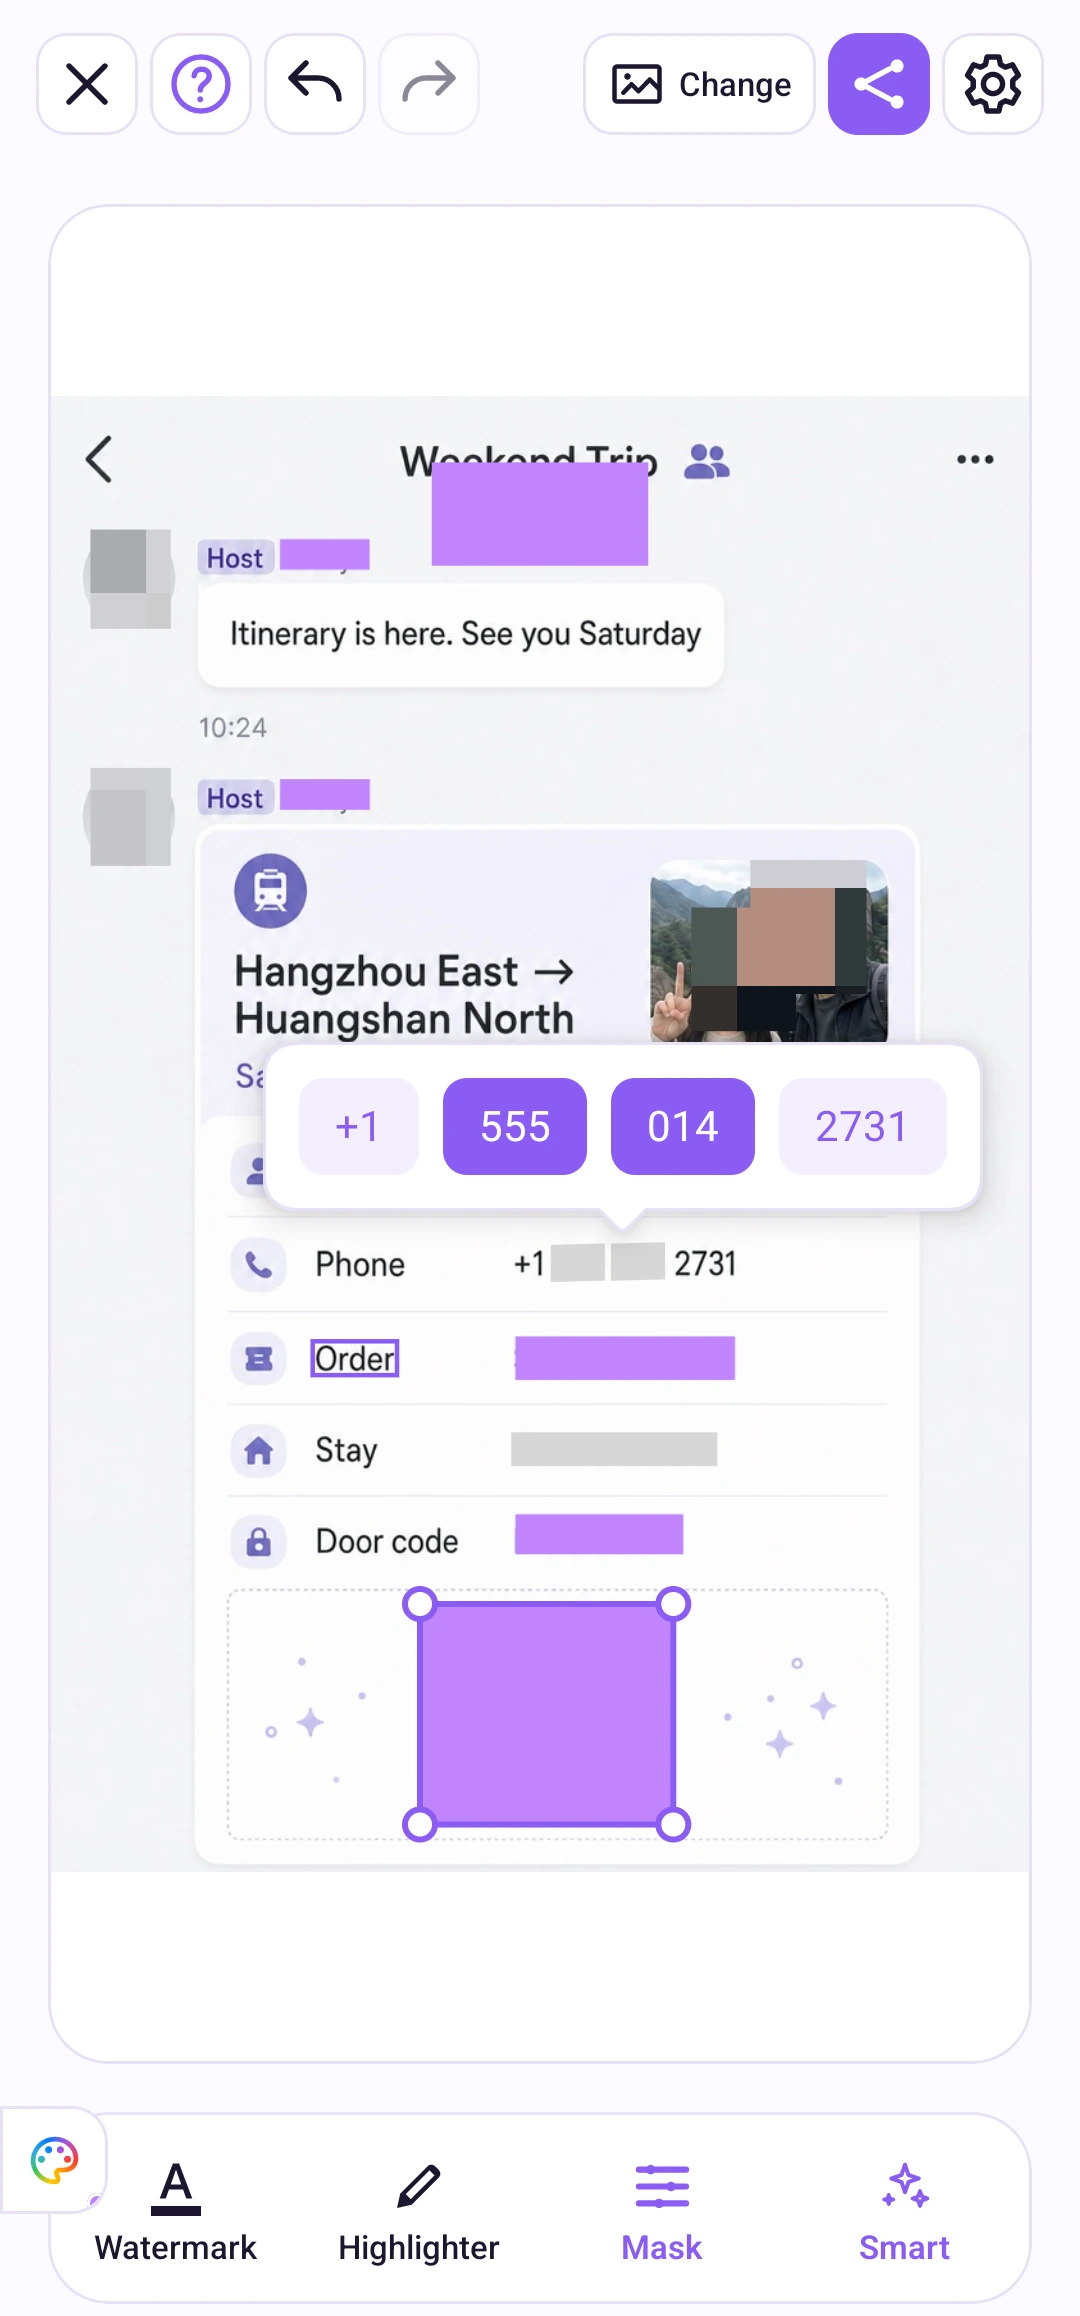
Adjust a rectangle
After drawing a rectangle, drag its corner handles to resize it. Tap the rectangle to finish adjusting; the mask stays in place. Tapping it again removes it. Drawing a new rectangle hides the previous rectangle's handles.
Use Undo and Redo to correct edits. Zoom in to check the edges and confirm that the whole detail is covered.
Effects and colors
Tap Mask or Marker to select the tool. Tap the selected tool again to open its controls. For masking, choose mosaic, blur or a solid block; Adjust contains rectangle or brush mode, size, and mosaic or blur strength.
For a solid block or marker, open the rainbow palette to change color and opacity. Use the color grid, spectrum, RGB or Hex input. You can drag the palette button to another edge of the canvas. Masking and marker settings are remembered separately.